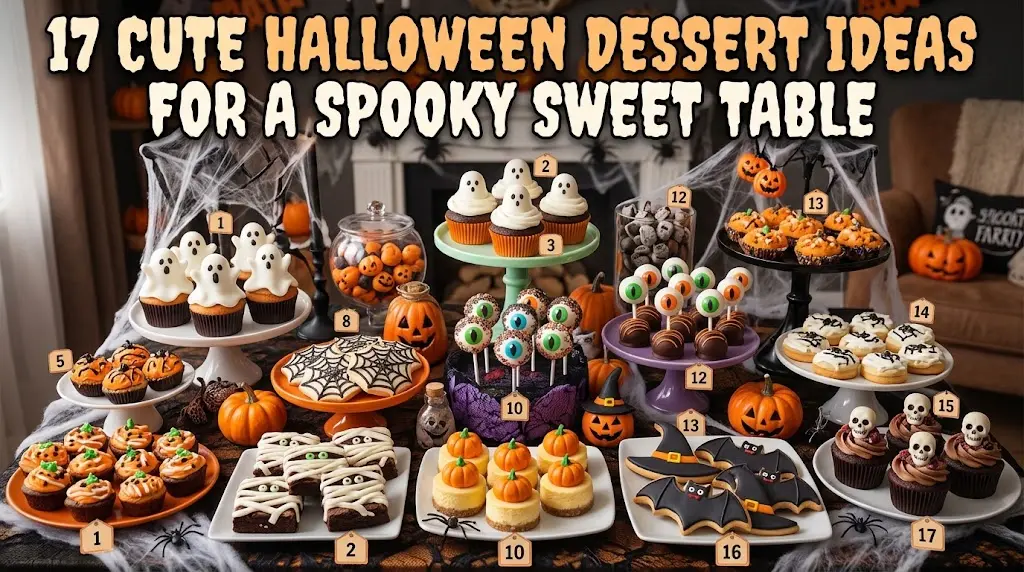
17 Cute Halloween Dessert Ideas for a Spooky Sweet Table
A Halloween dessert table doesn’t need complicated decorations to make a memorable impression. A mix of chocolate, pumpkin, colorful frosting, and simple spooky shapes can turn familiar homemade treats into festive party desserts. These Halloween dessert ideas include brownies, cupcakes, cookies, cheesecake bites, popcorn, and other easy sweets that work well for family gatherings, classroom-style celebrations, and Halloween parties. Each recipe uses approachable ingredients and straightforward techniques, so you can prepare several treats without turning the kitchen into a full-day project. Choose a few desserts with different colors, textures, and shapes to create a sweet table that feels playful and inviting.
1. Mummy Brownies
These fudgy mummy brownies are an easy way to give a classic chocolate dessert a Halloween makeover. A rich cocoa brownie base is cut into individual squares before being decorated with white frosting in loose mummy-band patterns. Small candy eyes add the spooky expression without requiring complicated decorating skills. The contrast between dark chocolate brownies and pale frosting makes them stand out beautifully on a Halloween dessert table. For a cleaner presentation, chill the brownies before decorating so the frosting stays defined. You can also make the brownie base a day ahead and decorate shortly before serving.

Ingredients
- 1 cup unsalted butter, melted
- 1 3/4 cups granulated sugar
- 3/4 cup unsweetened cocoa powder
- 4 large eggs
- 2 teaspoons vanilla extract
- 1 cup all-purpose flour
- 1/2 teaspoon salt
- 1 cup white vanilla frosting
- Small candy eyes
How to Make
- Heat the oven to 350°F. Line a 9-by-13-inch baking pan with parchment paper.
- Whisk melted butter, sugar, cocoa powder, eggs, and vanilla until smooth.
- Fold in flour and salt just until no dry streaks remain.
- Spread the batter evenly in the prepared pan.
- Bake for about 25–30 minutes, until the center is set and a toothpick comes out with a few moist crumbs.
- Cool completely before cutting into squares.
- Pipe thin, uneven strips of vanilla frosting across each brownie to resemble mummy wrapping.
- Add two candy eyes to each brownie and let the frosting set before serving.
Tips
- Chill the brownies for 20–30 minutes before cutting for cleaner squares.
- Don’t overbake if you want a fudgy center.
- Decorate the brownies after they are completely cool.
2. Ghost Vanilla Cupcakes
Soft vanilla cupcakes become adorable little ghosts with a simple swirl of white buttercream. The ghost shape comes from piping the frosting upward into a rounded peak, so there is no need for elaborate decorating tools. Tiny chocolate pieces or candy eyes create the face while keeping the overall look simple. These cupcakes are especially useful when you want something children can recognize immediately but adults will still enjoy. Bake the cupcakes in standard paper liners and use a large round or open star piping tip for an attractive finish.

Ingredients
- 1 1/2 cups all-purpose flour
- 1 1/2 teaspoons baking powder
- 1/4 teaspoon salt
- 1/2 cup unsalted butter, softened
- 3/4 cup granulated sugar
- 2 large eggs
- 2 teaspoons vanilla extract
- 1/2 cup whole milk
- 1/2 cup unsalted butter, softened, for frosting
- 2 cups powdered sugar
- 2 tablespoons heavy cream
- 1 teaspoon vanilla extract
- Small dark chocolate pieces for eyes
How to Make
- Heat the oven to 350°F and line a 12-cup muffin pan.
- Whisk flour, baking powder, and salt together.
- Beat butter and sugar until light and creamy.
- Add eggs one at a time, followed by vanilla.
- Add the dry ingredients alternately with milk, mixing just until combined.
- Divide the batter among the liners and bake for 18–22 minutes.
- Cool completely.
- Beat the frosting butter until creamy, then gradually add powdered sugar, cream, and vanilla.
- Pipe tall ghost-shaped swirls onto each cupcake.
- Add two small chocolate eyes.
Tips
- Use room-temperature ingredients for a smoother batter.
- Keep the frosting slightly firm so the ghost shapes hold.
- Pipe the frosting in one continuous upward motion.
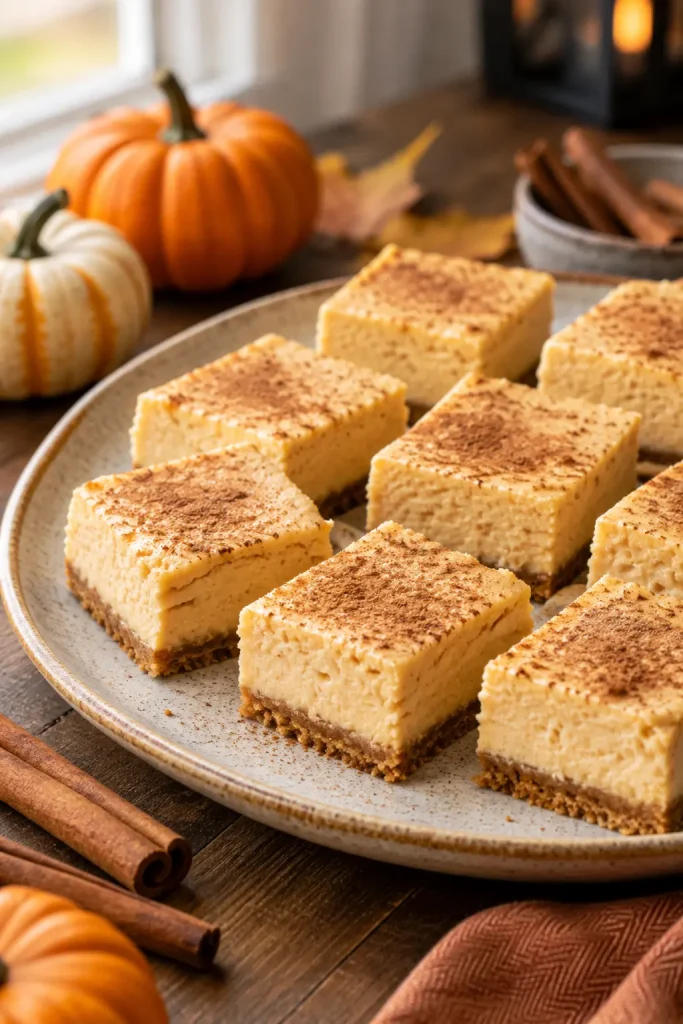
3. Pumpkin Spice Cheesecake Bites
These little cheesecake squares combine creamy pumpkin filling with warm cinnamon, nutmeg, and ginger. Instead of making one large cheesecake, the mixture is baked in a square pan and cut into bite-size portions for easier serving. A simple whipped topping or dusting of cinnamon gives each piece a festive finish. They bring the flavors of fall to a Halloween dessert spread without relying on heavy decorations. Make them ahead and refrigerate until firm before slicing.
Ingredients
- 1 1/2 cups graham cracker crumbs
- 5 tablespoons unsalted butter, melted
- 2 tablespoons brown sugar
- 16 ounces cream cheese, softened
- 1/2 cup granulated sugar
- 1 cup pumpkin puree
- 2 large eggs
- 1 teaspoon vanilla extract
- 1 teaspoon cinnamon
- 1/2 teaspoon ground ginger
- 1/4 teaspoon nutmeg
- 1/4 teaspoon salt
How to Make
- Heat the oven to 325°F. Line an 8-by-8-inch pan with parchment.
- Mix graham cracker crumbs, melted butter, and brown sugar.
- Press the mixture firmly into the bottom of the pan.
- Beat cream cheese and sugar until smooth.
- Add pumpkin, eggs, vanilla, cinnamon, ginger, nutmeg, and salt.
- Pour the filling over the crust.
- Bake for about 40–45 minutes, until the center is mostly set.
- Cool completely, then refrigerate for at least 3 hours.
- Cut into small squares and dust lightly with cinnamon.
Tips
- Chill thoroughly before slicing.
- Wipe the knife between cuts for cleaner edges.
- Keep refrigerated until serving.
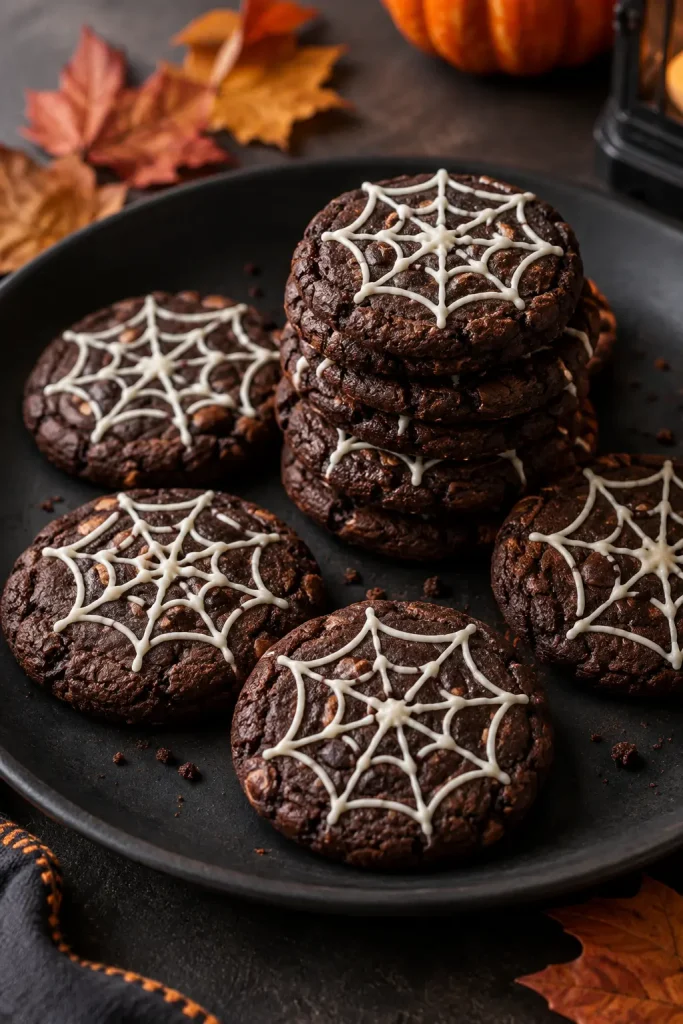
4. Chocolate Spiderweb Cookies
Chocolate cookies with a white icing spiderweb are a simple decorating project that looks much more elaborate than it is. The cookies have a soft, chocolate-rich center and crisp edges, while the icing creates the Halloween design on top. Draw several thin circles of icing and pull a toothpick from the center outward to create the web pattern. The finished cookies look especially striking when arranged together on a dark serving plate.
Ingredients
- 1 3/4 cups all-purpose flour
- 1/2 cup unsweetened cocoa powder
- 1/2 teaspoon baking soda
- 1/4 teaspoon salt
- 1/2 cup unsalted butter, softened
- 3/4 cup granulated sugar
- 1 large egg
- 1 teaspoon vanilla extract
- 1/2 cup powdered sugar
- 1–2 teaspoons milk
How to Make
- Heat the oven to 350°F and line two baking sheets.
- Whisk flour, cocoa powder, baking soda, and salt.
- Cream butter and sugar until smooth.
- Beat in the egg and vanilla.
- Gradually add the dry ingredients.
- Roll the dough into small balls and flatten slightly.
- Bake for 9–11 minutes.
- Cool completely.
- Mix powdered sugar with enough milk to make a thick piping icing.
- Pipe several circles on each cookie and drag a toothpick from the center outward to form webs.
Tips
- Keep the icing thick enough to hold its lines.
- Let cookies cool before decorating.
- Avoid dragging the toothpick through the cookie itself.
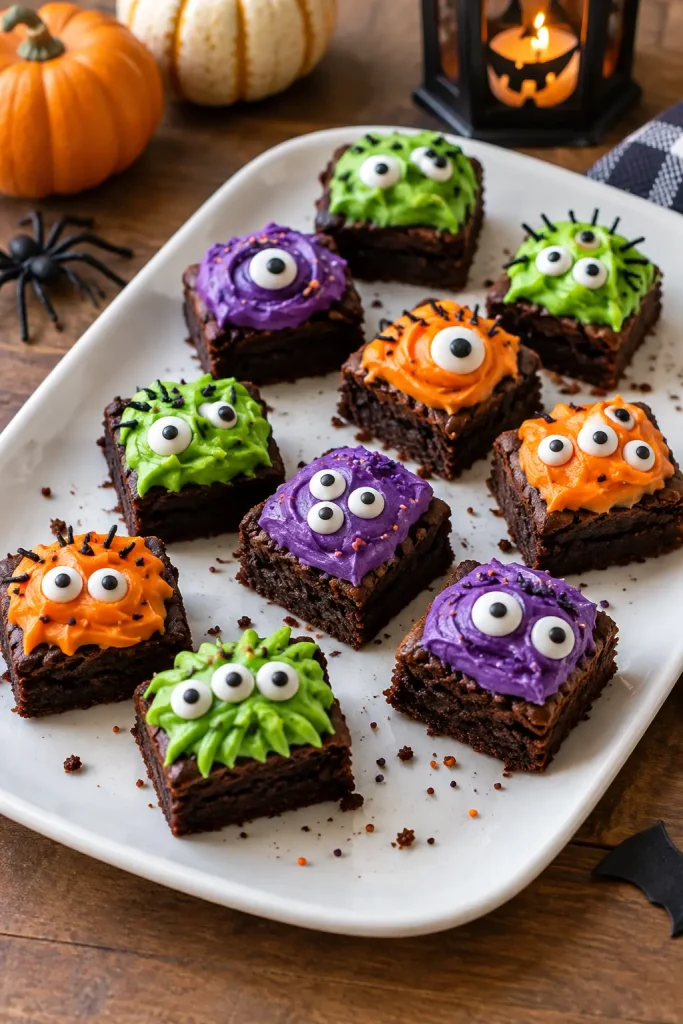
5. Monster Brownie Bites
These tiny brownie bites are decorated with colorful frosting and candy eyes to create playful Halloween monsters. Use different frosting colors so the dessert platter has plenty of visual variety. The brownie base can be baked in a square pan and cut into small pieces, making this recipe easier than baking individual brownies. Kids can also help decorate them after the brownies have cooled. Keep the designs deliberately uneven for a more cheerful homemade appearance.
Ingredients
- 1 cup unsalted butter, melted
- 1 3/4 cups granulated sugar
- 3/4 cup cocoa powder
- 4 large eggs
- 2 teaspoons vanilla extract
- 1 cup all-purpose flour
- 1/2 teaspoon salt
- 1 cup prepared vanilla buttercream
- Orange, green, and purple food coloring
- Small candy eyes
How to Make
- Heat the oven to 350°F and line a 9-by-13-inch pan.
- Whisk butter, sugar, cocoa, eggs, and vanilla.
- Fold in flour and salt.
- Spread into the pan and bake for 25–30 minutes.
- Cool completely.
- Cut into small squares or bite-size rectangles.
- Divide frosting into three bowls and tint each a different color.
- Pipe colorful frosting over the brownie bites.
- Add candy eyes in different arrangements.
Tips
- Use several eye sizes for more character.
- Keep the brownie pieces small enough for one or two bites.
- Refrigerate briefly if the frosting becomes too soft.
6. Chocolate-Dipped Strawberry Monsters
Fresh strawberries become colorful Halloween treats when dipped in melted chocolate and decorated with simple candy details. Use different chocolate colors to create several monster styles on the same platter. The fruit gives the dessert table a fresh contrast to heavier brownies and cookies. Make sure the strawberries are thoroughly dry before dipping so the chocolate coats them smoothly. These are best prepared close to serving time.

Ingredients
- 1 pound fresh strawberries
- 8 ounces dark chocolate, chopped
- 4 ounces white chocolate, chopped
- Small candy eyes
- 1 teaspoon neutral vegetable shortening, optional
How to Make
- Wash the strawberries and dry them completely.
- Melt the dark chocolate gently in a microwave-safe bowl in short intervals, stirring between each.
- Dip half of the strawberries into the chocolate and place them on parchment.
- Melt the white chocolate separately.
- Use a small piping bag or spoon to add simple monster details.
- Place candy eyes while the chocolate is still soft.
- Refrigerate for about 15 minutes until set.
Tips
- Completely dry strawberries are essential for good chocolate adhesion.
- Keep the finished strawberries refrigerated until serving.
- Use several simple designs rather than trying to make every berry identical.
7. Halloween Pumpkin Sugar Cookies
Pumpkin-shaped sugar cookies are a classic choice for a Halloween dessert table because they can be decorated in countless ways. A soft vanilla cookie provides a neutral base for orange icing, chocolate details, or simple black-and-white designs. Use a pumpkin cookie cutter for consistent shapes, then decorate only after the cookies have cooled completely. The dough can also be prepared ahead, making these useful for busy party planning.

Ingredients
- 3 cups all-purpose flour
- 1 teaspoon baking powder
- 1/2 teaspoon salt
- 1 cup unsalted butter, softened
- 1 cup granulated sugar
- 1 large egg
- 2 teaspoons vanilla extract
- 2 cups powdered sugar
- 2–3 tablespoons milk
- Orange and black food coloring
How to Make
- Whisk flour, baking powder, and salt.
- Cream butter and sugar until fluffy.
- Beat in the egg and vanilla.
- Gradually mix in the dry ingredients.
- Chill the dough for about 30 minutes.
- Heat the oven to 350°F.
- Roll the dough to about 1/4-inch thickness and cut pumpkin shapes.
- Bake for 9–11 minutes.
- Cool completely.
- Mix powdered sugar and milk into a thick icing, tint, and decorate.
Tips
- Chill the dough if it becomes difficult to roll.
- Don’t overbake or the cookies may become too crisp.
- Allow the icing to set before stacking.
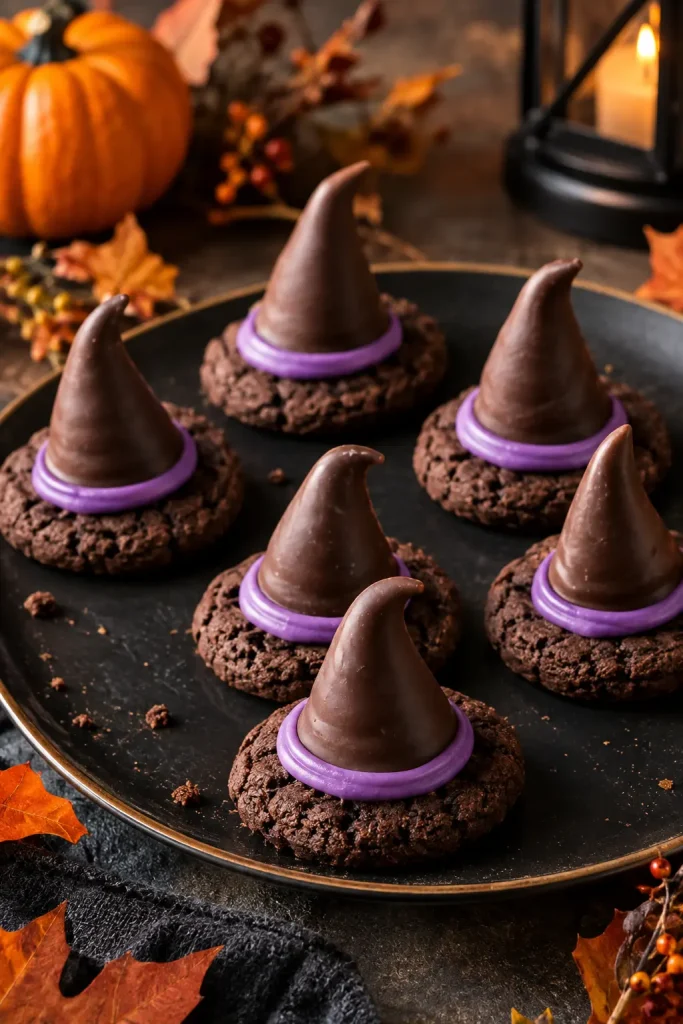
8. Witch Hat Chocolate Cookies
These playful witch hat cookies combine crisp chocolate cookies with a pointed chocolate topping made from simple components. A small cone-shaped chocolate decoration sits on each cookie, while a colorful frosting band gives the appearance of a tiny witch hat. They’re easy to arrange on a platter and add a recognizable Halloween shape without complicated baking techniques. Keep the decorations small so the cookies remain easy to eat.
Ingredients
- 1 1/2 cups all-purpose flour
- 1/3 cup cocoa powder
- 1/2 teaspoon baking powder
- 1/4 teaspoon salt
- 1/2 cup unsalted butter, softened
- 3/4 cup sugar
- 1 large egg
- 1 teaspoon vanilla extract
- 8 ounces dark chocolate, melted
- 1/2 cup vanilla frosting
- Purple food coloring
How to Make
- Heat the oven to 350°F.
- Whisk flour, cocoa, baking powder, and salt.
- Cream butter and sugar.
- Add egg and vanilla.
- Mix in the dry ingredients.
- Shape dough into small flat rounds and bake for 9–11 minutes.
- Cool completely.
- Dip or brush the top of each cookie with melted chocolate.
- Form small pointed chocolate decorations and place them on top.
- Pipe a thin purple frosting band around each hat.
Tips
- Let the chocolate cool slightly before decorating.
- Make the cookie bases sturdy enough to support the topping.
- Refrigerate briefly to help the chocolate set.
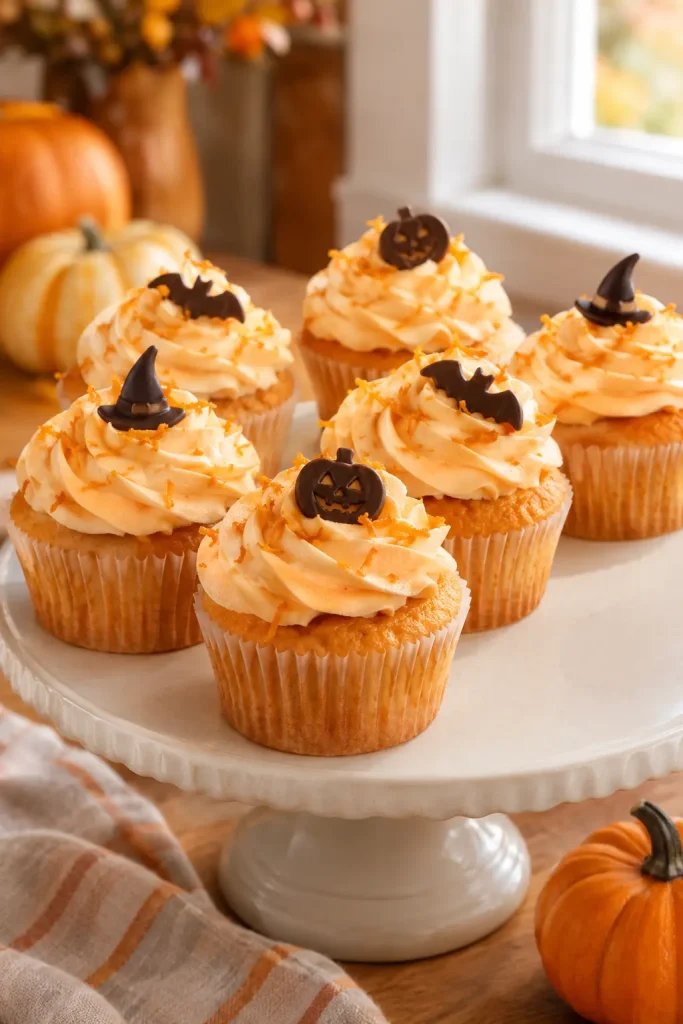
9. Orange Creamsicle Halloween Cupcakes
Bright orange cupcakes bring a cheerful color to a Halloween table while keeping the flavor light and citrusy. Vanilla cupcakes are paired with orange zest and a creamy orange frosting for a dessert that tastes like a classic creamsicle-inspired treat. A few simple dark chocolate decorations can add the Halloween element without overwhelming the citrus flavor. These cupcakes work particularly well when placed alongside darker chocolate desserts.
Ingredients
- 1 1/2 cups all-purpose flour
- 1 1/2 teaspoons baking powder
- 1/4 teaspoon salt
- 1/2 cup unsalted butter, softened
- 3/4 cup sugar
- 2 large eggs
- 1 teaspoon vanilla extract
- 1 tablespoon orange zest
- 1/2 cup milk
- 1/2 cup unsalted butter, softened, for frosting
- 2 cups powdered sugar
- 2 tablespoons orange juice
- 1 teaspoon orange zest
- Orange food coloring, optional
How to Make
- Heat the oven to 350°F and line a muffin pan.
- Combine flour, baking powder, and salt.
- Cream butter and sugar.
- Add eggs one at a time, then vanilla and orange zest.
- Alternate the dry ingredients with milk.
- Divide the batter among the liners.
- Bake for 18–22 minutes and cool.
- Beat the frosting butter, powdered sugar, orange juice, and zest until creamy.
- Tint lightly if desired and pipe onto the cupcakes.
- Add simple chocolate decorations.
Tips
- Use fresh orange zest for stronger flavor.
- Avoid adding too much orange juice to the frosting.
- Let cupcakes cool fully before decorating.
10. Chocolate Graveyard Pudding Cups
Individual chocolate pudding cups create a fun Halloween dessert that is easy to portion for a party. Crushed chocolate cookies form a dark crumb layer, while homemade cookie or chocolate decorations can be shaped like small tombstones. A few crumbs scattered over the top give the dessert a natural graveyard appearance. Serve them in clear glasses so the layers remain visible.

Ingredients
- 1/2 cup granulated sugar
- 1/4 cup unsweetened cocoa powder
- 3 tablespoons cornstarch
- 1/4 teaspoon salt
- 2 1/2 cups whole milk
- 3 ounces semisweet chocolate, chopped
- 1 teaspoon vanilla extract
- 1 1/2 cups crushed chocolate cookies
- Small homemade chocolate-cookie decorations
How to Make
- Whisk sugar, cocoa powder, cornstarch, and salt in a saucepan.
- Gradually whisk in milk until smooth.
- Cook over medium heat, stirring constantly, until the mixture thickens and begins to bubble.
- Remove from the heat and stir in chopped chocolate and vanilla.
- Cool slightly.
- Spoon pudding into clear cups.
- Add crushed chocolate cookies over the top.
- Insert small cookie decorations and refrigerate until chilled.
Tips
- Stir constantly while cooking to prevent lumps.
- Press plastic wrap directly against the pudding surface if chilling before assembly.
- Assemble the crumb topping shortly before serving for the best texture.
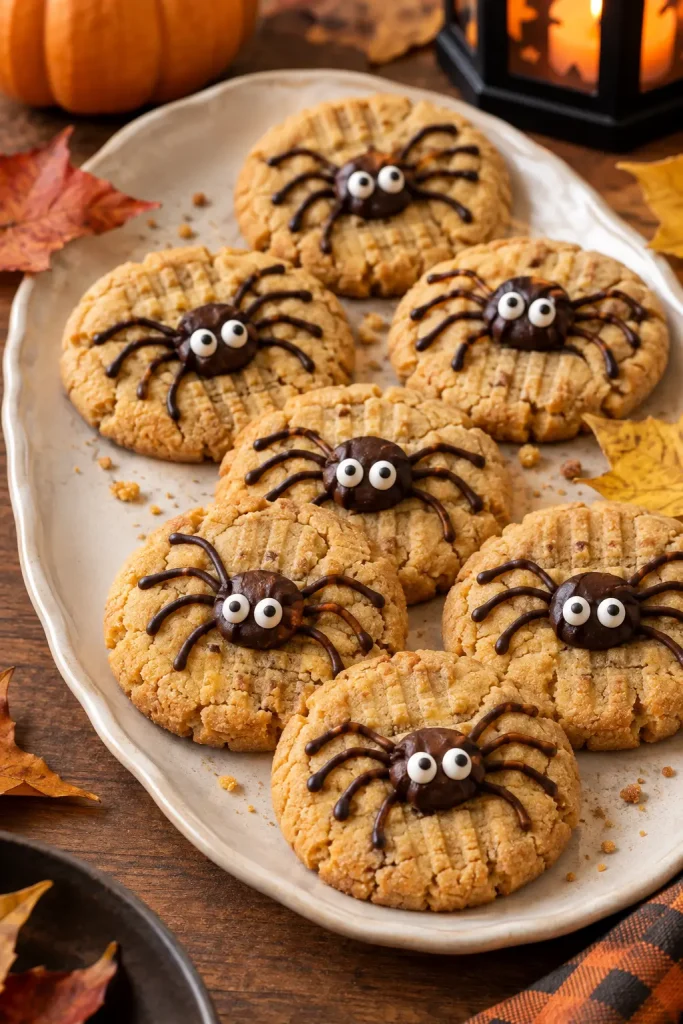
11. Peanut Butter Spider Cookies
Soft peanut butter cookies become Halloween-ready with simple chocolate spider decorations. The cookie itself provides a rich, nutty base, while melted chocolate creates the spider legs and small candy eyes give each cookie personality. Keep the spider design simple so the cookies remain easy to decorate. These are especially good for a mixed dessert table because they offer a flavor different from the many chocolate-forward Halloween treats.
Ingredients
- 1 cup creamy peanut butter
- 1/2 cup unsalted butter, softened
- 3/4 cup brown sugar
- 1/4 cup granulated sugar
- 1 large egg
- 1 teaspoon vanilla extract
- 1 1/2 cups all-purpose flour
- 1/2 teaspoon baking soda
- 1/4 teaspoon salt
- 4 ounces semisweet chocolate, melted
- Small candy eyes
How to Make
- Heat the oven to 350°F and line a baking sheet.
- Beat peanut butter, butter, brown sugar, and granulated sugar until creamy.
- Add the egg and vanilla.
- Mix in flour, baking soda, and salt.
- Roll into balls and place on the baking sheet.
- Flatten lightly with a fork.
- Bake for 9–11 minutes.
- Cool completely.
- Pipe chocolate spider bodies and legs onto the cookies.
- Add small candy eyes while the chocolate is soft.
Tips
- Don’t overbake the cookies if you prefer a soft center.
- Allow the cookies to cool completely before adding chocolate.
- Use a small piping bag or a parchment cone for thin spider legs.
12. Caramel Apple Nachos
Instead of serving whole caramel apples, turn the idea into an easy-to-share dessert platter. Crisp apple slices are arranged in layers and drizzled with warm caramel and melted chocolate, then finished with chopped nuts and a light sprinkle of cinnamon. The combination gives the dessert table something fresh and crunchy alongside cakes and cookies. Serve soon after assembling so the apples stay crisp.

Ingredients
- 3 large apples
- 1/2 cup caramel sauce
- 3 ounces semisweet chocolate, melted
- 1/3 cup chopped toasted pecans
- 1/2 teaspoon ground cinnamon
- 1 tablespoon lemon juice
How to Make
- Core and thinly slice the apples.
- Toss the slices gently with lemon juice.
- Arrange them on a large serving platter.
- Warm the caramel slightly if needed for drizzling.
- Drizzle caramel over the apples.
- Add melted chocolate in thin lines.
- Sprinkle with chopped pecans and cinnamon.
- Serve immediately.
Tips
- Slice apples shortly before serving.
- Choose crisp varieties that hold their shape.
- Use a spoon or piping bag for controlled drizzling.
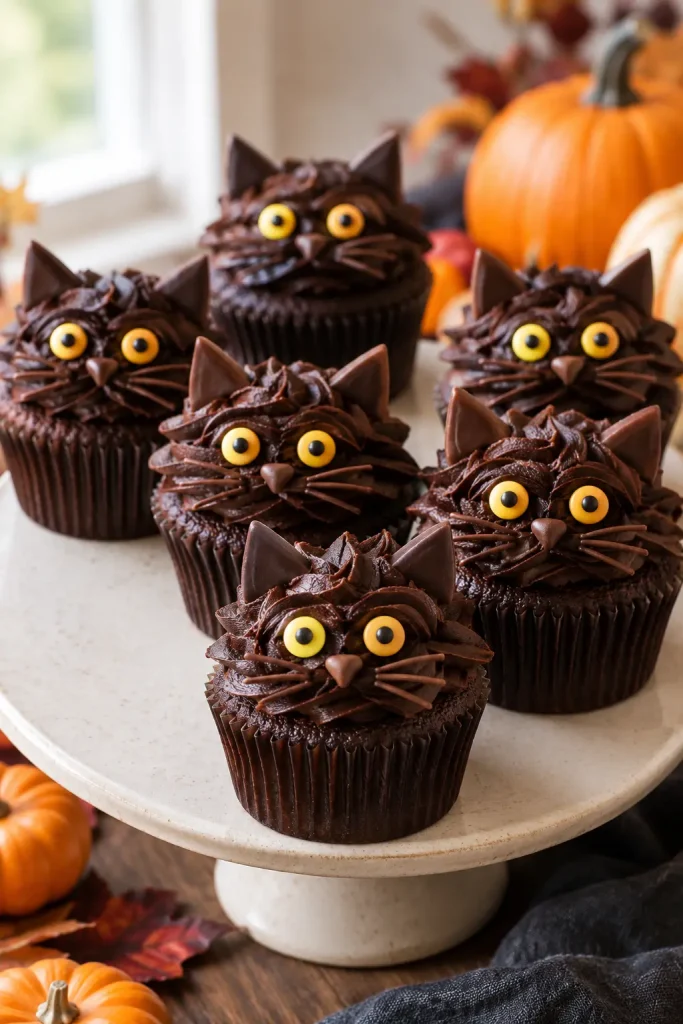
13. Black Cat Chocolate Cupcakes
These rich chocolate cupcakes are decorated as friendly black cats using chocolate frosting and simple edible details. The pointed ears can be made with small chocolate pieces, while the eyes and whiskers add the finishing touches. The design doesn’t need to be perfectly symmetrical, which makes these cupcakes approachable for home bakers. Use a simple chocolate cupcake base so the decoration remains the focus.
Ingredients
- 1 1/2 cups all-purpose flour
- 3/4 cup unsweetened cocoa powder
- 1 1/2 teaspoons baking powder
- 1/2 teaspoon baking soda
- 1/2 teaspoon salt
- 1 cup granulated sugar
- 2 large eggs
- 1/2 cup vegetable oil
- 1 teaspoon vanilla extract
- 3/4 cup milk
- 1/2 cup hot water
- 1/2 cup unsalted butter, softened, for frosting
- 2 cups powdered sugar
- 1/3 cup cocoa powder
- 2–3 tablespoons milk
- Candy eyes
- Small chocolate pieces for ears
How to Make
- Heat the oven to 350°F and line a muffin pan.
- Whisk flour, cocoa, baking powder, baking soda, and salt.
- Beat sugar, eggs, oil, and vanilla.
- Mix in the dry ingredients and milk.
- Slowly stir in hot water.
- Divide among the liners.
- Bake for 18–21 minutes and cool.
- Beat butter, powdered sugar, cocoa, and milk until fluffy.
- Pipe chocolate frosting onto each cupcake.
- Add chocolate ears and candy eyes.
Tips
- The batter will be fairly thin, which is normal.
- Cool cupcakes completely before frosting.
- Use a slightly firmer frosting for defined cat ears.
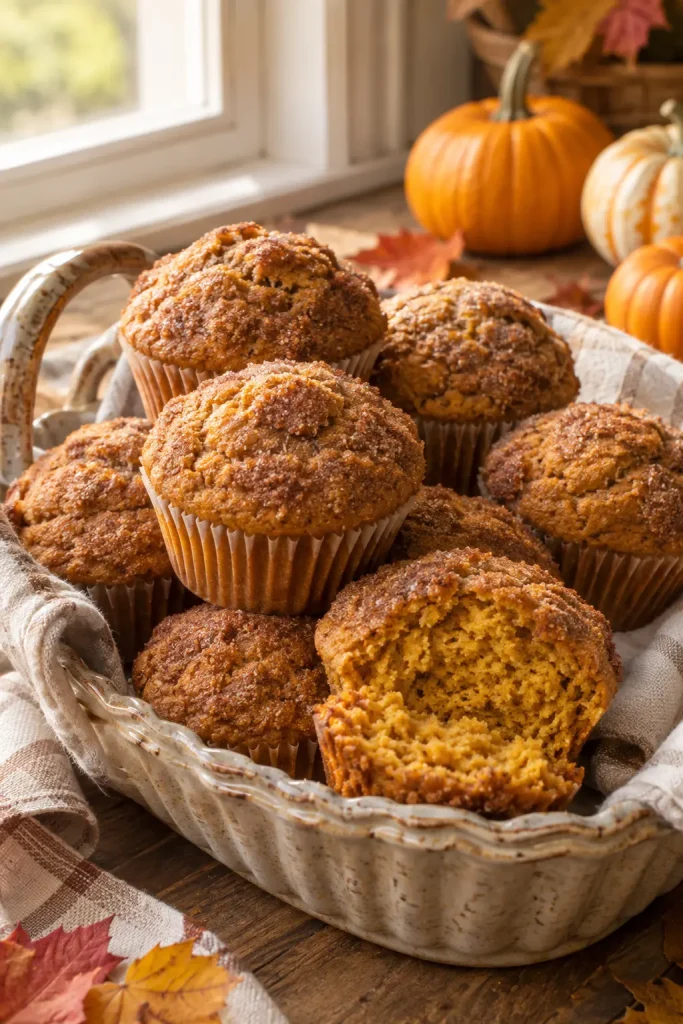
14. Cinnamon Sugar Pumpkin Muffins
These pumpkin muffins are a softer, more breakfast-style addition to a Halloween dessert spread. Pumpkin puree keeps the crumb moist while cinnamon and nutmeg give them a warm autumn flavor. A simple cinnamon-sugar topping creates a lightly crisp surface without heavy frosting. Serve them in decorative paper liners for a festive look, or arrange them in a rustic basket for a more relaxed table.
Ingredients
- 1 3/4 cups all-purpose flour
- 1 teaspoon baking soda
- 1/2 teaspoon baking powder
- 1/2 teaspoon salt
- 1 teaspoon cinnamon
- 1/4 teaspoon nutmeg
- 1/2 cup unsalted butter, melted
- 3/4 cup brown sugar
- 2 large eggs
- 1 cup pumpkin puree
- 1 teaspoon vanilla extract
- 1/4 cup milk
- 2 tablespoons granulated sugar
- 1/2 teaspoon cinnamon
How to Make
- Heat the oven to 375°F and line a 12-cup muffin pan.
- Whisk flour, baking soda, baking powder, salt, cinnamon, and nutmeg.
- Combine melted butter and brown sugar.
- Whisk in eggs, pumpkin, vanilla, and milk.
- Fold the wet mixture into the dry ingredients.
- Divide the batter among the liners.
- Mix granulated sugar and cinnamon and sprinkle over the tops.
- Bake for 18–22 minutes, until a toothpick comes out clean.
- Cool for several minutes before serving.
Tips
- Don’t overmix the batter.
- Use pure pumpkin puree rather than pumpkin pie filling.
- The muffins can be served warm or at room temperature.
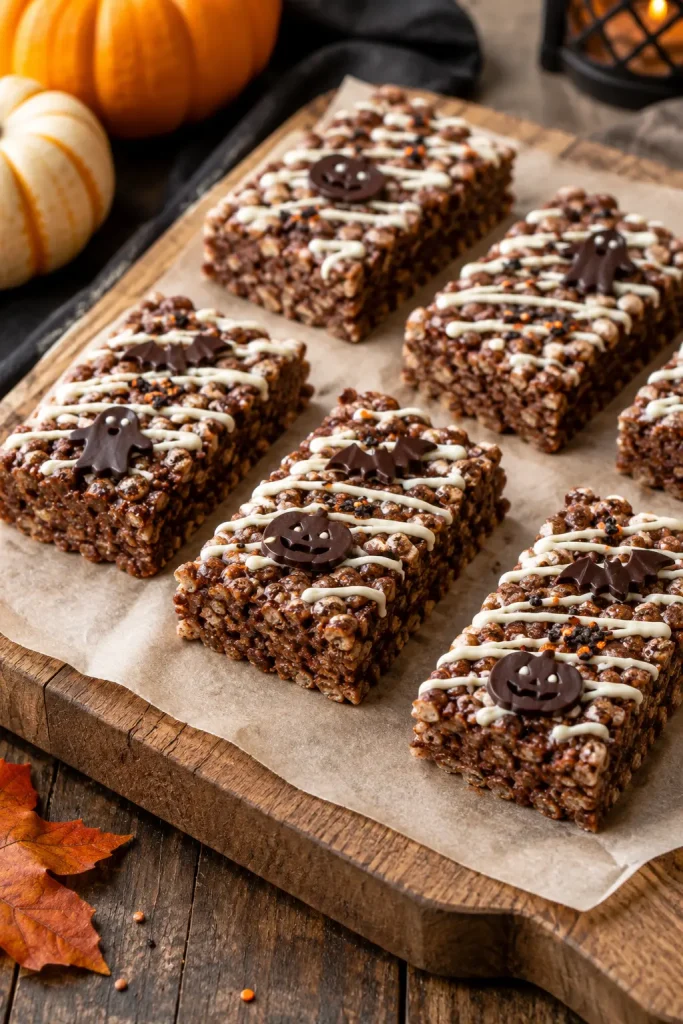
15. Spooky Chocolate Rice Cereal Bars
Chewy chocolate cereal bars are quick to make and easy to shape for Halloween. Cocoa gives the bars a deeper flavor, while a simple drizzle of white chocolate creates spooky lines across the surface. Cut them into rectangles or use a small cookie cutter after chilling. These bars are especially convenient when you need a no-bake option for a busy party menu.
Ingredients
- 5 cups crispy rice cereal
- 4 tablespoons unsalted butter
- 10 ounces chocolate chips
- 1/3 cup creamy peanut butter
- 1 teaspoon vanilla extract
- 4 ounces white chocolate, melted
How to Make
- Line an 8-by-8-inch pan with parchment.
- Melt butter and chocolate chips together over low heat.
- Stir in peanut butter and vanilla.
- Remove from the heat and gently fold in the cereal.
- Press firmly into the prepared pan.
- Refrigerate for about 1 hour.
- Cut into bars.
- Drizzle melted white chocolate over the top.
- Allow the drizzle to set before serving.
Tips
- Press firmly enough for the bars to hold together without crushing the cereal.
- Chill before cutting for cleaner edges.
- Keep the white chocolate drizzle relatively thin.
16. Mini Pumpkin Cheesecakes
Individual pumpkin cheesecakes make a polished addition to a Halloween dessert table while keeping portions small and easy to serve. Each one has a buttery graham cracker crust and creamy pumpkin filling flavored with cinnamon and vanilla. A small swirl of whipped cream can finish the top without hiding the pumpkin color. Bake them in a muffin pan for consistent individual servings.

Ingredients
- 1 cup graham cracker crumbs
- 3 tablespoons melted unsalted butter
- 1 tablespoon brown sugar
- 12 ounces cream cheese, softened
- 1/2 cup pumpkin puree
- 1/2 cup granulated sugar
- 1 large egg
- 1 teaspoon vanilla extract
- 1 teaspoon cinnamon
- 1/4 teaspoon nutmeg
- 1/4 teaspoon salt
- Whipped cream, for serving
How to Make
- Heat the oven to 325°F and line a 12-cup muffin pan.
- Mix graham cracker crumbs, melted butter, and brown sugar.
- Divide the crust mixture among the liners and press down.
- Beat cream cheese and sugar until smooth.
- Add pumpkin, egg, vanilla, cinnamon, nutmeg, and salt.
- Divide the filling among the cups.
- Bake for 18–22 minutes, until the centers are mostly set.
- Cool completely and refrigerate for at least 2 hours.
- Add a small amount of whipped cream and cinnamon before serving.
Tips
- Avoid overbaking; the centers should retain a slight softness.
- Refrigerate before removing the cheesecakes from the liners.
- Add whipped cream shortly before serving.
17. Halloween Chocolate Bark
Chocolate bark is one of the easiest ways to finish a Halloween dessert table because it requires minimal baking and can be customized with different textures. Melted chocolate is spread into a thin layer and topped with colorful candy pieces, chopped nuts, and small Halloween-inspired decorations. Once firm, break it into irregular pieces for a homemade look. Use a mixture of dark and white chocolate to create a dramatic contrast without making the dessert overly complicated.

Ingredients
- 12 ounces dark chocolate, chopped
- 6 ounces white chocolate, chopped
- 1/3 cup toasted chopped almonds
- 1/3 cup colorful candy pieces
- 2 tablespoons mini chocolate candies
- 1/4 teaspoon flaky sea salt
How to Make
- Line a baking sheet with parchment paper.
- Melt the dark chocolate gently until smooth.
- Spread it into an even layer about 1/4-inch thick.
- Melt the white chocolate separately.
- Drizzle the white chocolate over the dark chocolate.
- Use a toothpick to create loose swirls.
- Sprinkle almonds, candy pieces, chocolate candies, and a small amount of sea salt over the surface.
- Refrigerate for about 30–45 minutes, until completely firm.
- Break into irregular pieces and serve.
Tips
- Don’t spread the chocolate too thin or the bark may become difficult to handle.
- Add toppings before the chocolate sets.
- Store the finished bark in an airtight container in a cool place.